

To perform a pre-trip inspection on an electric bus, start by gathering all necessary documentation and inspection tools. Check the exterior for damage, tire condition, and lights, guaranteeing everything functions properly. Inspect the motor compartment for signs of damage, corrosion, and secure electrical connections. Inside, verify safety features like fire extinguishers and emergency exits are operational. Finally, confirm system controls, warning lights, and charge levels are normal before departure—continue exploring for detailed steps you can follow to ensure a safe trip.
Key Takeaways
- Review all documentation and checklists, ensuring vehicle details and inspection points are prepared before starting.
- Conduct a thorough exterior inspection, focusing on damage, tire condition, lights, and emergency equipment.
- Examine the motor compartment for signs of damage, corrosion, proper cable routing, and cooling system integrity.
- Inspect interior safety features, including fire extinguishers, emergency exits, seat belts, and signage.
- Perform final checks on systems—warning lights, charge level, tires, emergency kits—and complete a walk-around before operation.
Preparing for the Inspection
To prepare effectively for an electric bus inspection, start by gathering all necessary documentation, including a detailed checklist and inspection forms like the Battery Electric Bus Inspection/Road Test Checklist. Make sure to record vehicle details such as VIN and local number for identification. Use the checklist to confirm all inspection points are covered and ensure compliance with regulations by maintaining accurate records of findings. Establish a reporting timeline for any defects or issues discovered during the inspection. Prepare your inspection tools, including a multimeter, battery testing equipment, and safety testing tools. Set up a clean, well-lit environment with proper grounding and easy access to all bus parts. Schedule inspections during maintenance windows and ensure qualified inspectors are available for a thorough, efficient process. Additionally, understanding juice detox side effects can help you recognize potential health issues that might affect your inspection readiness. Ensuring your knowledge of industry trends can also help you stay current with best practices and regulatory updates for electric bus maintenance and safety. Being familiar with vehicle electrical systems can further assist in diagnosing and troubleshooting during inspections. Regularly reviewing manufacturer specifications and performance metrics ensures that inspection standards are met and the vehicle operates safely.
Conducting the Exterior Check

Start your exterior check by visually inspecting the bus’s outer surfaces to identify any damage or wear. Look for dents, scratches, or signs of structural issues. A thorough inspection can help prevent security vulnerabilities by detecting potential points of entry or damage early. Additionally, inspecting for wear and tear can ensure the vehicle remains safe and reliable over time. Incorporating visual inspection techniques can help identify issues that might not be immediately obvious. Check the tires for proper inflation, uneven wear, or damage, and ensure lug nuts are tight. Verify all mirrors are secure and uncracked, and that windows are clean and free of cracks or obstructions. Confirm all lights—headlights, taillights, brake lights—are clean, functional, and unobstructed. Inspect emergency equipment like fire extinguishers and first aid kits for accessibility. Test service doors and handrails to ensure they open, close, and are undamaged. Finally, examine exterior panels and fasteners for security, and ensure safety decals and labels are visible and intact. Refrigerants and environmental impact considerations are important to ensure the system’s efficiency and safety.
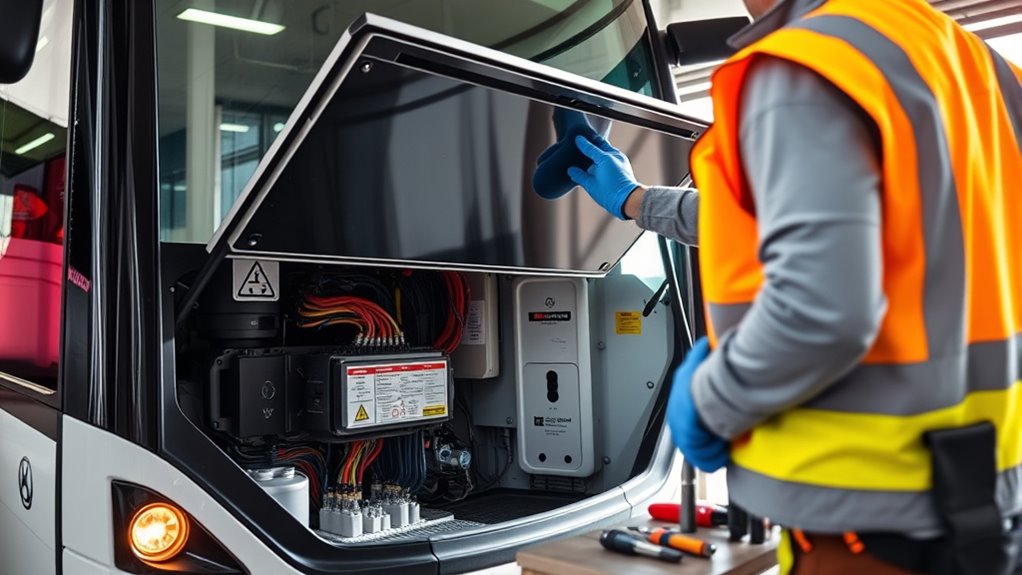
Examining the Motor Compartment
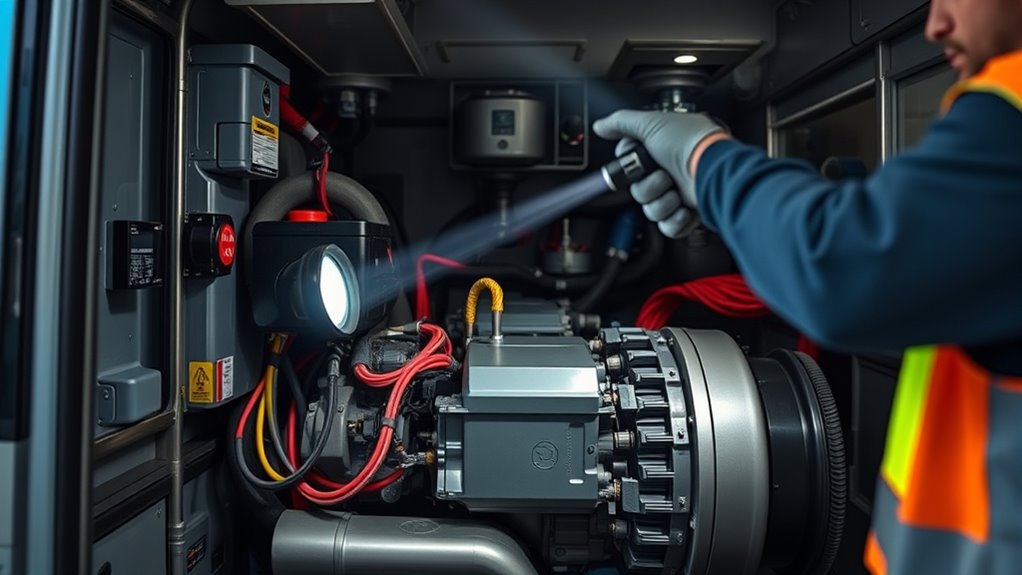
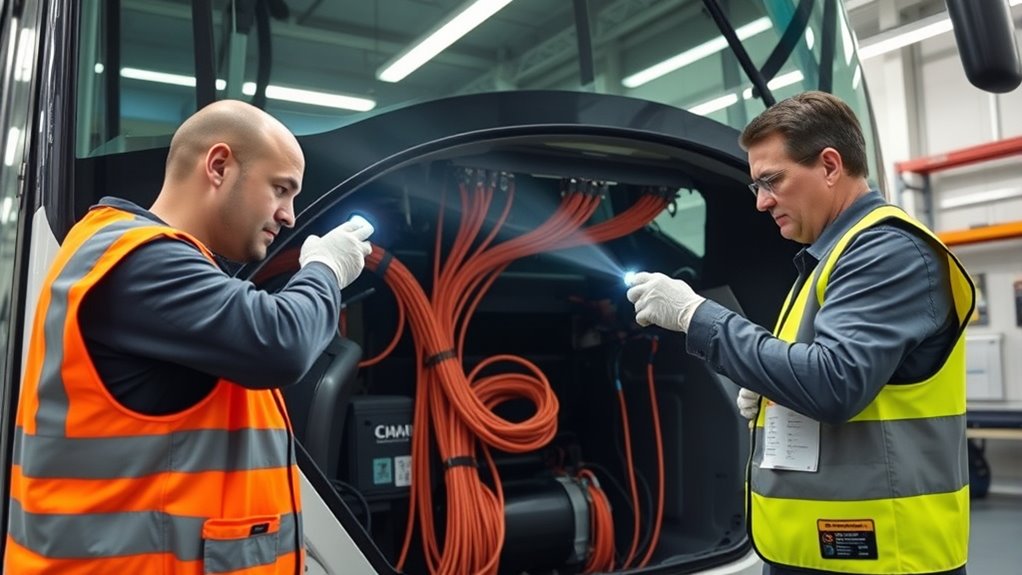
When examining the motor compartment, focus on verifying that all components are in proper condition and securely installed. Check the electric motor, usually located centrally or at the rear, for any signs of damage or corrosion. Ensure the cooling system is functioning correctly, with no leaks or blockages. Inspect the power inverters for damage or malfunction, and verify that electrical cables are secure, not frayed, and properly routed. Confirm the motor housing is intact and securely closed, with no leaks of coolant or lubricant. Examine heat exchangers for damage, and ensure electrical insulation is intact. Confirm that all components are mounted properly, grounded, and shielded appropriately. Additionally, contrast ratio plays a role in the visibility of detailed images, which is relevant when assessing the clarity of visual indicators within the motor area. Regularly checking for signs of wear can help prevent unexpected failures and maintain optimal performance. Conducting preventive maintenance routines can also extend the lifespan of vital electrical components. Being aware of security measures can help protect the electrical systems from cyber threats and physical damage.
Inspecting Interior Systems and Safety Features

Inspecting interior systems and safety features is essential to guarantee the bus provides a safe environment for both drivers and passengers. Begin by checking emergency equipment: ensure fire extinguishers are accessible with gauges in the operational range, first aid kits are complete, unexpired, and sealed, and body fluid cleanup kits are available and properly sealed. Confirm that the vehicle’s interior lighting and signage meet safety standards. Test emergency exits for proper handles, latches, and signage, and confirm safety glass hammers are securely mounted and reachable. Inspect driver controls and instruments, verifying dashboard warning lights work, gauges show correct readings, seat belts are intact, and manual door controls function properly. Assess passenger safety features like seat integrity, stepwell lighting, handrails, interior dome lights, and audible HV system alarms. Ensure the interior is clean, free of obstructions, and warning labels are visible. Additionally, verify that regional bank operating hours do not interfere with scheduled maintenance or inspections. Regularly reviewing safety standards helps maintain compliance and enhances overall safety during inspections. Incorporating interior condition assessments into your routine inspections can further identify potential hazards early and prevent future issues. Also, consider the interior design to ensure that all safety features are ergonomically accessible and clearly visible to passengers and staff.
Performing Final Pre-Operation Checks
Performing final pre-operation checks guarantees the electric bus is ready for safe operation before departure. First, verify all dashboard warning lights are off, ensuring no system alerts remain. Check that the charge level meets the minimum required for your route, and confirm the parking brake is fully disengaged by releasing the yellow switch. Test the accelerator pedal responsiveness without moving the bus and validate the neutral gear selection via the “N” button. Engage the forward/reverse selector to confirm proper drive mode. Ensure the parking brake auto-applies when shutting down and test regenerative braking at low speeds. Recheck exterior lighting, emergency signage, tire pressures, and charging port integrity. Additionally, inspecting the battery connections can prevent unexpected power issues during operation. Finally, record the pre-trip completion, confirm emergency kits are accessible, and perform a thorough walk-around to clear debris and secure all doors. Incorporating proper vehicle tuning can also improve overall system responsiveness and efficiency.
Frequently Asked Questions
How Often Should Battery Health Be Monitored During Inspections?
You should monitor the battery health regularly during inspections to guarantee peak performance and longevity. Using tools like TNO’s CheckUp or BMS systems, aim for at least weekly assessments, especially in extreme environmental conditions.
Continuous monitoring helps you catch potential issues early, track degradation, and maximize charging strategies. Staying proactive with battery health checks not only extends battery life but also reduces operational costs and ensures safety.
What Specific Tools Are Needed for Electrical System Testing?
Think of electrical system testing tools as your toolkit for uncovering hidden faults. You’ll need a multimeter to measure voltage, current, and resistance, along with insulation testers for checking cables.
Circuit testers help identify circuit issues, while thermal imaging cameras reveal overheating spots.
Data loggers monitor performance over time, and specialized tools like high-voltage testers and BMS diagnostics guarantee your electric bus runs safely and efficiently.
How to Identify Signs of High-Voltage System Faults?
To identify signs of high-voltage system faults, you should first check the Multi-Function Display for warning messages or fault indicators.
Look for the red “EV Stop” indicator and high voltage exposure alerts.
Monitor indicator lights for abnormal patterns, and verify if the HV system energized indicator is on.
During your inspection, also confirm connectors are secure and undamaged.
Watch for flashing HV maintenance signals which point to faults needing attention.
Are There Special Precautions for Inspecting High-Voltage Components?
Like a cautious explorer approaching a guarded temple, you must take special precautions when inspecting high-voltage components. Always use specialized, rated tools and follow the manufacturer’s guidelines carefully.
Wear PPE to protect against shocks, and guarantee the isolation systems are functioning properly. Remember, proper training is essential to avoid accidents.
Post warning signs and never rush; safety is your highest priority when handling these powerful electrical systems.
What Is the Recommended Procedure for Handling Fluid Leaks?
When handling fluid leaks, first identify the source by inspecting beneath the bus, battery compartments, and high-voltage junctions.
Always wear PPE, including gloves and safety glasses, and isolate high-voltage cables before approaching leaks.
Use absorbent materials like sand to contain spills, and avoid open flames or sparks.
Carefully dispose of contaminated materials as hazardous waste, then document the leak and follow up with proper repairs and safety checks.
Conclusion
By performing a thorough pre-trip inspection, you guarantee the safety and reliability of your electric bus. Remember, a well-maintained vehicle can reduce breakdowns by up to 50%, keeping passengers safe and on schedule. Take your time to check every detail, from the exterior to interior systems. When you do, you’re not just preparing for a smooth ride—you’re safeguarding lives and contributing to a cleaner, greener future on the road.