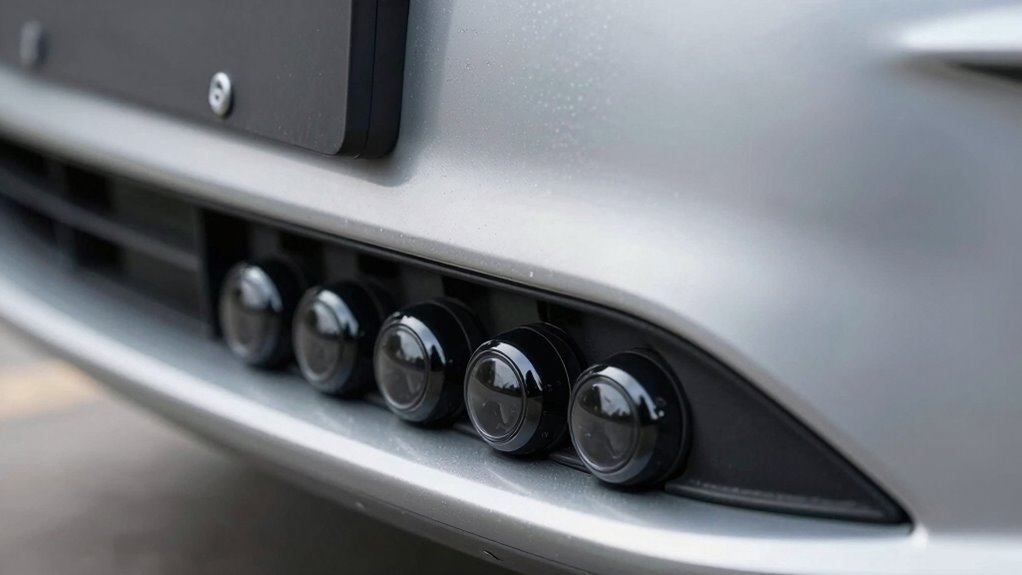
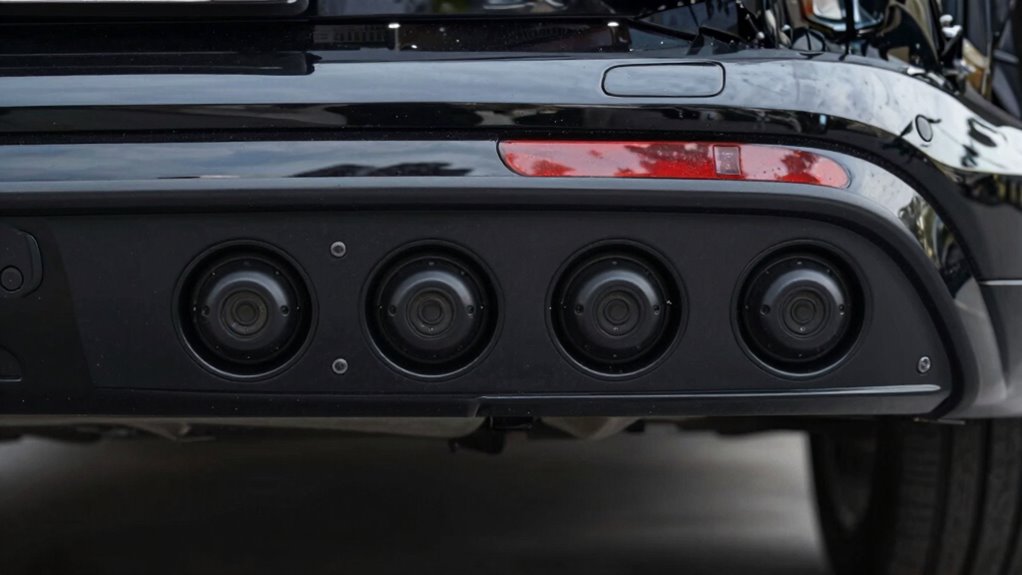
To stop false beeps from your aftermarket parking sensors, follow the key placement rule: install sensors flush with the bumper at the correct height, usually near the center, and away from reflective surfaces or obstructions. Proper positioning guarantees accurate obstacle detection and reduces interference from weather or dirt. Avoid mounting sensors too close to edges or moving parts. For more tips on perfect placement and maintenance, keep exploring how to optimize your parking sensor setup.
Key Takeaways
- Install sensors flush with the bumper surface to prevent misreads caused by uneven or protruding mounting.
- Position sensors near the center of the bumper, slightly above the license plate, avoiding edges and overhanging objects.
- Keep sensors away from reflective surfaces or moving parts that can cause false signals.
- Ensure sensors are protected from weather elements like rain, snow, and dirt to maintain signal clarity.
- Regularly calibrate and clean sensors to prevent false beeps caused by dirt, misalignment, or environmental interference.
AUTO OCCASION Parking Sensor Retainer Bracket for Mercedes Benz
Fitment: Compatible with Mercedes Benz G ML SLK SLC C E S Class please kindly check the OEM…
As an affiliate, we earn on qualifying purchases.
As an affiliate, we earn on qualifying purchases.
Why Proper Sensor Placement Reduces False Beeps
Proper sensor placement is crucial because it directly impacts the accuracy of your parking sensors. When sensors aren’t correctly positioned, they can misinterpret obstacles or trigger false alarms. Sensor calibration is essential to guarantee each sensor responds accurately to its surroundings. If sensors are misaligned, they might pick up irrelevant signals, leading to unnecessary beeps. Weather effects like rain, snow, or dirt can also interfere with sensor readings, causing false alerts. Proper placement helps minimize these issues by ensuring sensors are shielded from elements that could skew their signals. Regularly checking and adjusting sensor alignment ensures reliable performance. Additionally, understanding the sensor placement rule is key to optimizing sensor accuracy. Correct placement often follows a specific installation guideline that ensures sensors are optimally positioned relative to the vehicle’s bumper and potential obstacles. Ensuring that sensors are protected from environmental factors can further reduce false alarms caused by weather conditions. Properly aligning sensors according to manufacturer instructions can significantly improve detection accuracy and reduce false beeps. Ultimately, correct placement and calibration reduce false beeps, making parking easier and safer without unnecessary distractions.
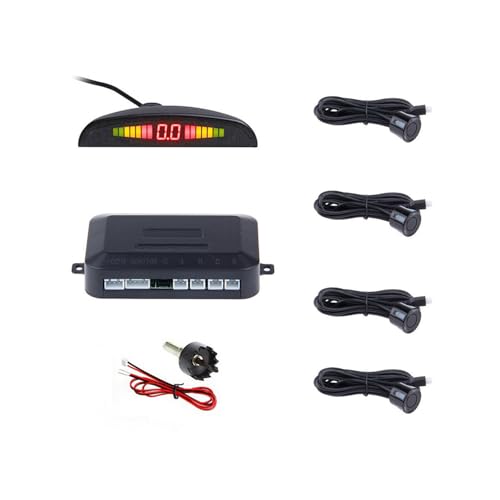
Car Parking sensors,4 Sensors kit Parking sensors Buzzer Radar,Desplay LED,Acoustic Auto Reverse Backup System, 6m Sensor Cable for Pickup Trucks, Small Trucks, etc (Black)
Automatically detects obstacles behind the car when reversing, automatically turns on and on.
As an affiliate, we earn on qualifying purchases.
As an affiliate, we earn on qualifying purchases.
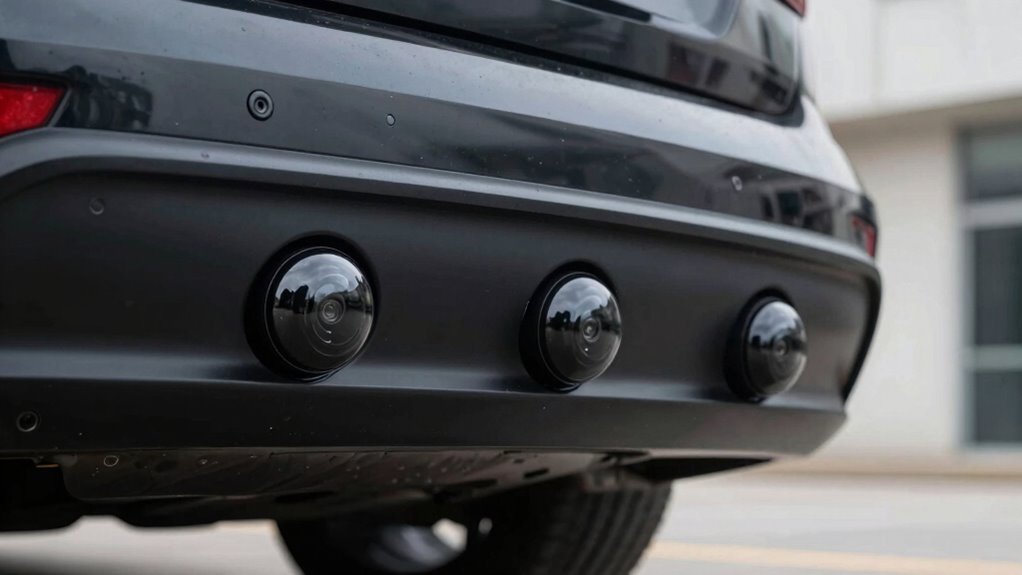
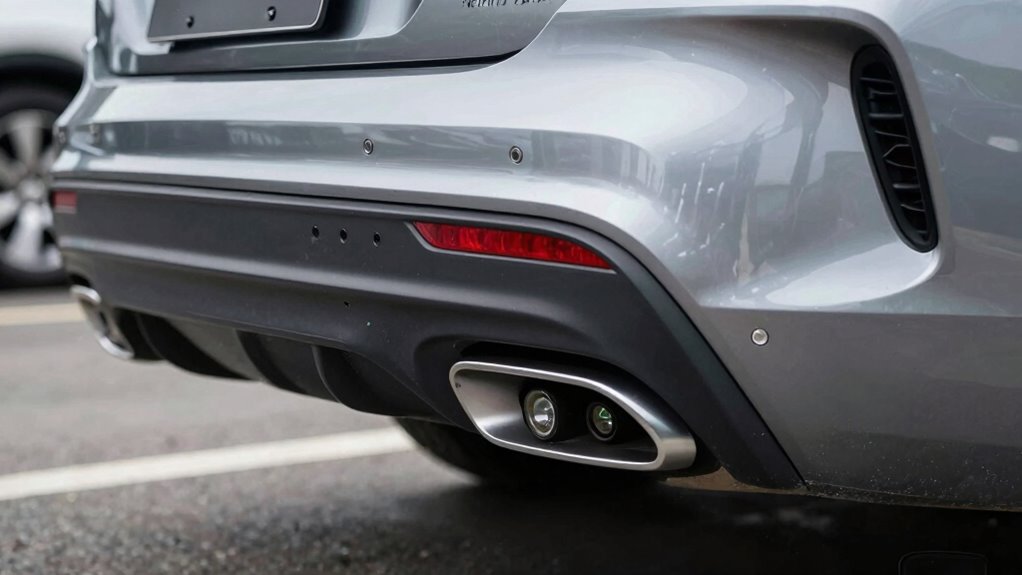
The Key Placement Rule for Effective Parking Sensors
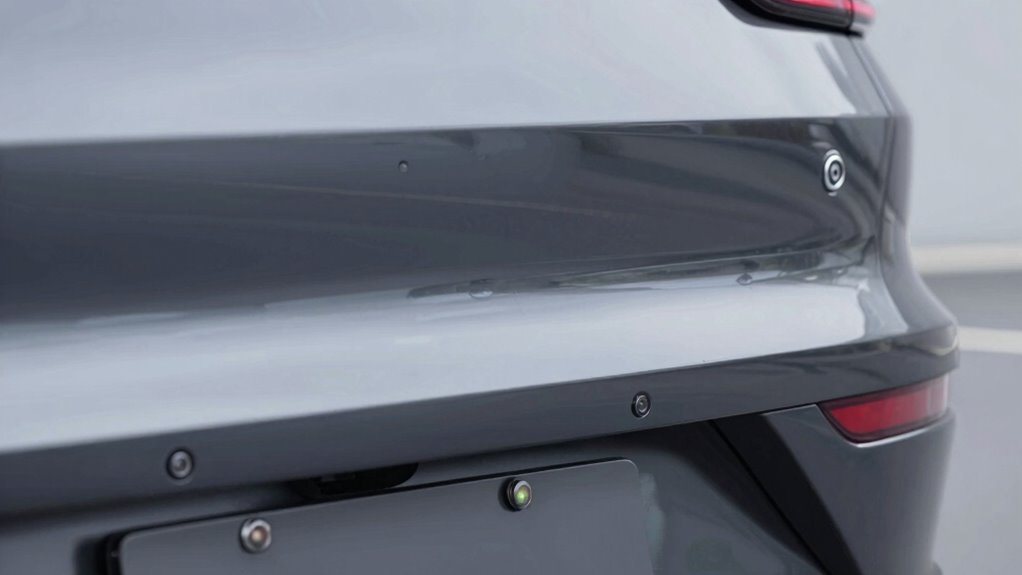
To guarantee your parking sensors work effectively, the key placement rule is to install them at the correct height and position relative to your vehicle’s bumper. Proper placement ensures accurate sensor calibration, which is essential for reliable alerts. Different sensor types, such as ultrasonic or electromagnetic, may require specific positioning to function ideally. For example, ultrasonic sensors should be mounted flush with the bumper to prevent false alarms, while electromagnetic sensors need to be embedded properly within the bumper surface. Always follow manufacturer guidelines for placement and calibration to avoid misreads or missed detections. Correct positioning not only improves sensor accuracy but also prevents unnecessary beeping, making your parking experience safer and more efficient. Additionally, understanding sensor calibration is crucial for maintaining optimal performance over time. Ensuring consistent installation techniques can help prolong the lifespan of your parking sensors and maintain their accuracy. Proper sensor placement also minimizes the risk of damage from external impacts, further supporting reliable operation. Regularly inspecting sensor alignment and adjusting position as needed can help maintain peak performance and prevent false alerts. Moreover, using professional installation services can ensure that sensors are correctly positioned for maximum effectiveness.

Bumper Park Assist Object Sensor Fit Chevy Silverado/Tahoe GMC Yukon XL
[Compatible with]Bumper Park Assist Object Sensor Fit for 2017-2020 GMC Acadia,for 2014-2018 GMC Sierra 1500,for 2014-2019 GMC Sierra…
As an affiliate, we earn on qualifying purchases.
As an affiliate, we earn on qualifying purchases.
Common Placement Mistakes That Cause False Alarms
Incorrect placement of parking sensors is a common cause of false alarms, disrupting your parking experience. If sensors aren’t properly calibrated, they may react to objects or environmental factors instead of real obstacles. Poor calibration can lead to sensors misjudging distances, causing unnecessary beeps. Weather effects also play a significant role—rain, snow, and dirt can interfere with sensor signals, making them more prone to false alerts. Mounting sensors too close to the bumper edges or uneven surfaces can further compromise their accuracy. To avoid these issues, verify your sensors are correctly calibrated after installation and regularly checked, especially after adverse weather. Sensor placement is crucial for ensuring reliable performance. Proper placement and maintenance help minimize false alarms, giving you a smoother, more reliable parking experience. Additionally, understanding how sensor technology works can help you troubleshoot and optimize their effectiveness.

K&F CONCEPT 24mm Full Frame Sensor Cleaning Swab*6 + 20ml Sensor Cleaner, DSLR SLR Digital Camera CMOS and CCD Sensor Cleaning Swab Kits for Nikon Sony Canon Camera Clean
【6 Pieces of 24mm Sensor Cleaning Swabs】 Tailored according to the size of the Full frame frame sensor;Smudge-and…
As an affiliate, we earn on qualifying purchases.
As an affiliate, we earn on qualifying purchases.
How to Choose the Best Spot for Your Parking Sensors

Choosing the right spot for your parking sensors is key to their effectiveness. You need to focus on ideal sensor placement, avoid obstructions, and keep a safe distance from objects. Doing so ensures your sensors work accurately and keep you safe while parking. Additionally, understanding early warning signs of obstacles can help prevent accidents and damage. Proper kitchen equipment placement principles can serve as a helpful analogy for optimal sensor positioning, ensuring consistent performance. Being aware of water damage prevention strategies can also inform how you maintain and adjust your sensors to withstand environmental factors, much like routine checkups in health care help detect issues early and ensure longevity. Regularly inspecting your sensors for environmental resilience can further enhance their durability and reliability over time.
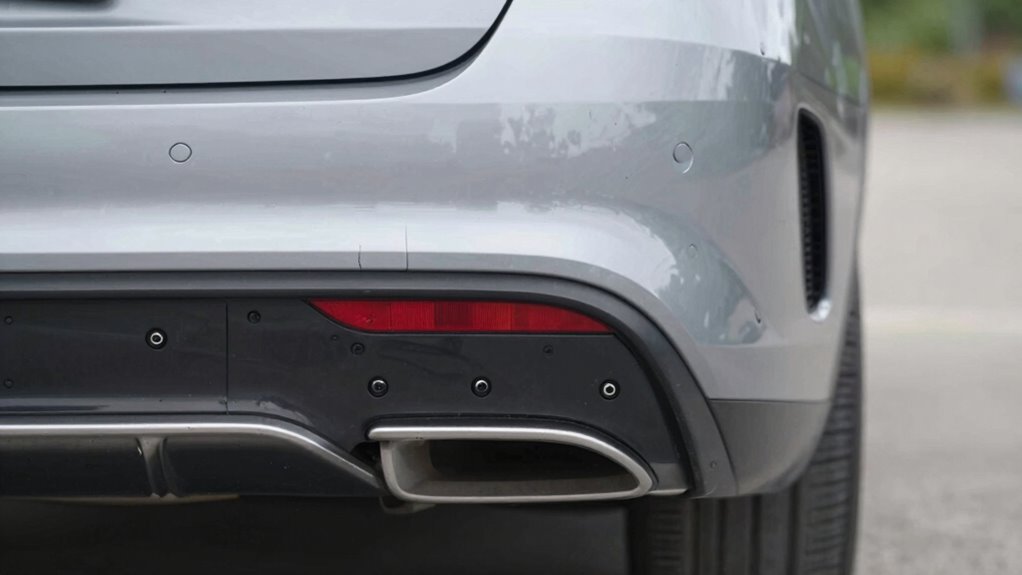
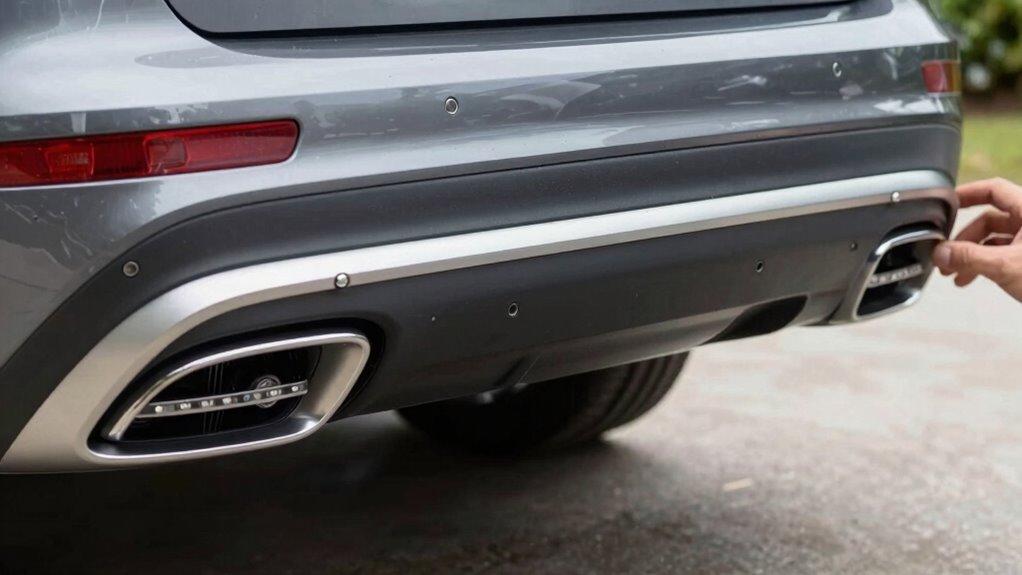
Optimal Sensor Placement
Selecting the right spot for your parking sensors is essential to guarantee they function effectively and provide accurate alerts. Position sensors where they can be easily calibrated, ensuring they detect obstacles correctly. Typically, this means placing them on the rear bumper, slightly above the license plate, and avoiding areas prone to weather impacts like snow, ice, or heavy rain. Proper placement helps prevent false alarms caused by dirt or debris, and consistent sensor calibration ensures reliable readings over time. Remember, weather impacts can affect sensor sensitivity, so check and recalibrate them after extreme conditions. Avoid mounting sensors too high or too low, as this can hinder detection range. Clear, unobstructed placement maximizes sensor performance and helps you park safely and confidently. Additionally, understanding measurement accuracy and how environmental factors influence sensor readings can further optimize their effectiveness. Regularly inspecting and cleaning the sensors can also maintain their sensor longevity and ensure optimal operation. To enhance detection reliability, consider environmental factors such as temperature fluctuations and their impact on sensor performance. Being aware of sensor calibration techniques can also significantly improve obstacle detection accuracy.
Avoid Obstructions Effectively
Proper placement of your parking sensors is key to avoiding false alarms caused by obstructions. To ensure effective detection, choose spots free from nearby objects that could trigger false beeps. Proper sensor calibration is essential, especially for aftermarket compatibility, so sensors accurately interpret distances. Avoid mounting sensors near reflective surfaces or moving parts that could interfere with signals. Select locations where obstructions are unlikely, such as open areas or clear sides of your bumper. Use the following table to identify ideal spots:
| Obstruction Type | Best Placement Strategy |
|---|---|
| Reflective surfaces | Keep sensors away from mirrors or shiny objects |
| Moving parts | Avoid areas with close, moving components |
| Overhanging objects | Install sensors below or away from them |
| Narrow spaces | Place sensors where clearance is ample |
| Debris or dirt | Regularly clean sensors for clear signals |
This approach enhances sensor calibration and aftermarket compatibility, reducing false alarms. Additionally, ensuring proper sensor installation helps maintain accurate detection and prolongs the lifespan of your system. Paying attention to sensor positioning can significantly improve overall performance and reliability, especially when considering obstruction-aware placement.
Maintain Safe Distance
To make sure your parking sensors work effectively, you need to position them where they can maintain a safe distance from obstacles without false alarms. Proper sensor calibration is essential to guarantee accurate detection and prevent unnecessary beeps. When choosing a spot, align your sensors with parking lot markings to help guide placement and maintain consistent distances from obstacles. Avoid mounting sensors too close to bumpers or uneven surfaces, as this can lead to false alarms or missed detections. Regularly check the sensor calibration, especially after adjustments or impacts, to ensure optimal performance. Proper sensor placement is crucial for maximizing detection accuracy and reducing false alarms. Additionally, using essential DIY tools and following safety tips can help ensure a secure and precise installation process. By maintaining a safe distance from obstacles and aligning with parking lot markings, you’ll reduce false beeps and improve your parking experience.
Step-by-Step Guide to Installing Sensors Correctly
Installing aftermarket parking sensors requires careful preparation and attention to detail to guarantee peak performance. First, choose the correct sensor placement, ideally near the rear bumper’s center, avoiding areas with weather effects like mud or snow. Drill holes carefully, then insert sensors, ensuring they’re flush. Connect wiring securely, following manufacturer instructions. Once installed, perform sensor calibration by reversing slowly and checking the beeps’ consistency. Test the system in different weather conditions to confirm reliable performance. Keep in mind, improper placement can trigger false beeps, so precision matters. Use the table below to guide your installation process:
| Step | Action |
|---|---|
| 1 | Choose proper placement |
| 2 | Drill holes & insert sensors |
| 3 | Calibrate sensors & test |
Troubleshooting False Beeps After Installation
False beeps after installing your parking sensors can be frustrating, but they often stem from simple issues that are easy to fix. One common cause is incorrect sensor calibration. If sensors aren’t properly calibrated to your vehicle’s specifications, they may signal false alerts. Double-check the calibration process, ensuring the sensors recognize the correct distance parameters. Wiring issues also frequently cause false beeps. Loose or damaged wires can send inconsistent signals, triggering false alerts. Inspect all wiring connections, making sure they’re secure and free of corrosion or damage. If you notice any faulty wiring, replace or repair it promptly. Additionally, verify that the sensors are installed in the correct position, following the placement rules. Addressing these issues can considerably reduce or eliminate false beeping.
Tips for Maintaining Sensor Accuracy Over Time
Regular maintenance of your parking sensors guarantees they stay accurate as time goes on. To ensure consistent performance, regularly check and perform sensor calibration, especially after any impact or noticeable errors. Keep the sensors clean by removing dirt, snow, or debris that can interfere with their signals. Weather effects like rain, snow, or extreme temperatures can affect sensor accuracy, so be mindful of these conditions. During harsh weather, periodically test your sensors to confirm they’re functioning correctly. If you notice false beeps or inconsistent readings, recalibrate or replace faulty sensors promptly. Proper care and attention help preserve their effectiveness, preventing false alerts and ensuring safe, smooth parking every time.
How Following Proper Placement Improves Your Parking Experience

Proper placement of your parking sensors is essential for maximizing their effectiveness and ensuring a smoother parking experience. Correct sensor calibration guarantees the system accurately detects obstacles, reducing false beeps and missed alerts. When sensors are improperly placed, calibration can be off, causing frustration and potential accidents. Additionally, proper placement helps minimize weather impact; sensors placed too low or in exposed areas may be affected by rain, snow, or dirt, leading to false alerts or malfunctions. By following placement rules, you ensure your sensors work reliably regardless of weather conditions. This improves safety, saves time, and enhances confidence during parking. Ultimately, thoughtful placement supports consistent sensor performance, making parking easier and more convenient in all scenarios.
Frequently Asked Questions
Can Weather Conditions Affect Parking Sensor Accuracy?
Weather conditions can definitely affect your parking sensor accuracy. Cold, rain, or snow impact sensor calibration, causing false alerts or missed signals. When the weather changes, your sensors might need recalibration to maintain accuracy. Harsh weather impacts the sensors’ ability to detect objects reliably, so regularly checking and adjusting them ensures your parking system stays precise and reduces false beeps despite weather influence.
Are Aftermarket Sensors Compatible With All Vehicle Models?
Installing aftermarket sensors is like fitting puzzle pieces together—you need to guarantee sensor compatibility and proper vehicle integration. Not all sensors work with every vehicle model, so check the manufacturer’s specifications before buying. Some sensors are designed for specific makes or models, while others are more universal. To avoid issues, verify compatibility to ensure your parking sensors function smoothly and accurately, regardless of your vehicle type.
How Long Does a Typical Parking Sensor Installation Take?
Installation of aftermarket parking sensors typically takes about 1 to 3 hours. You’ll need basic installation tools like a drill, screwdrivers, and possibly a wiring kit. Once installed, you should calibrate the sensors to guarantee they work correctly, which can take an extra 10-15 minutes. Proper calibration is key to preventing false beeps, so follow the manufacturer’s instructions carefully during the process.
Do Sensors Require Regular Recalibration?
Yes, sensors do require regular recalibration to guarantee accurate detection and avoid false beeps. You should perform sensor calibration whenever you notice inconsistent alerts or after any impact or repairs. Regular sensor maintenance helps keep them functioning properly, extending their lifespan and maintaining safety. Check your vehicle’s manual for specific calibration procedures, or consider professional assistance if you’re unsure, to keep your parking sensor system reliable.
What Safety Precautions Should I Take During Installation?
During installation, prioritize safety by wearing gloves and eye protection to prevent injuries. Make sure your vehicle is turned off and parked on a flat surface to avoid accidental movement. Use proper tools and handle them carefully, following manufacturer instructions. Keep the workspace clear of obstacles to prevent slips or falls. Taking these precautions minimizes risks, ensures proper installation, and helps you avoid potential damage to your vehicle or personal injury.
Conclusion
Remember, proper placement is the secret to hassle-free parking sensors. By following the key rules and avoiding common mistakes, you’ll reduce false beeps and enjoy smoother parking. Regular maintenance keeps your sensors in top shape, ensuring they serve you well over time. As the saying goes, “A stitch in time saves nine”—taking a little extra care now prevents bigger headaches later. Keep your sensors well-placed, and parking will become a breeze!